
User Guide of Leawo DVD Creator for Mac
What can Leawo DVD Creator for Mac do for you?
- Burn video to DVD, 3D DVD and ISO
- Edit video by trimming, cropping, rotating, effecting and watermarking
- Set 3D details by selecting 3D modes and 3D Depth values
- Customize DVD menu with multiple features
With this Mac DVD Creator software, and video can be burned into DVD with different effects so as to be played on any DVD players. Follow the step-by-step guide below to burn video to DVD, 3D DVD and ISO on Mac operating system.
Step 1: DVD Creator Mac Download
You can easily download this clean Mac DVD Creator and install it on your Mac quickly without any technical knowledge required. Add video or video folder to the program and you will see the interface below.
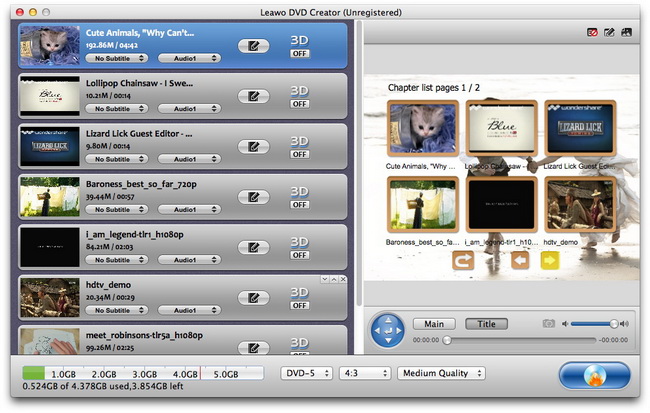
Step 2: Output DVD Video Editing and Setting
This step is offered for those who want to create DVD with individualized features and burn 3D DVD with branded traits.
Part 1: Video Editing
In this part, you can get the exact video length by trimming, get the necessary video size by cropping, obtain the right video display angle by rotating, adjust video features by effecting and add image or text over the video by watermarking.
1. Trim: under this option you can trim video to milliseconds. Drag the slider to cut video length or set values in Start Time and End Time boxes. You will see the total Clip Length.
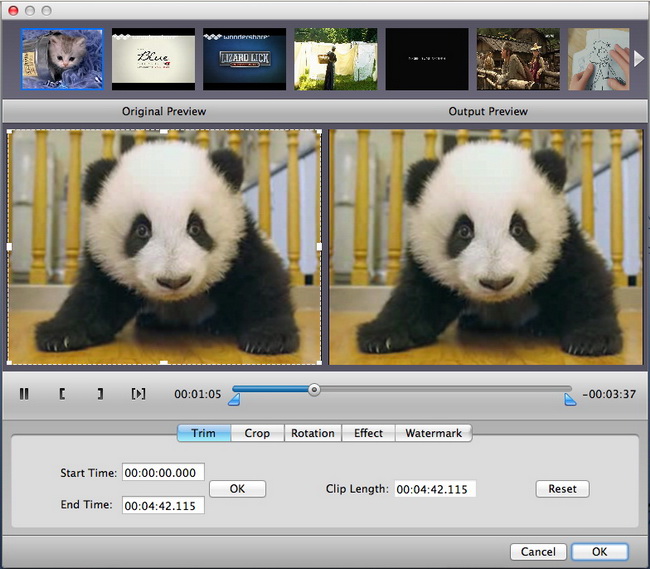 2. Crop: under this option you are able to remove the unwanted part of the video. Move the dot frame on the video to get the required part, or input specific values to Left, Top, and Cropped Size.

3. Rotation: under this option you can revolve video to any angle. You can achieve horizontal flip & vertical flip, or realize to rotate 90° clockwise and rotate 90° counterclockwise.

4. Effect: under this option you will add special effects to video. Move the sliders to adjust video brightness, contrast, saturation and Volume Zoom.

5. Watermark: under this option you have the ability to add logo or banner to your video. Check "Enable Watermark" then you can add either image or text as watermark. Video transparency, left margin, top margin and image size can be set.

Part 2: 3D Video Setting
Switch to the 3D Settings interface and you can choose a mode for setting:Red/Cyan, Red/Green, Red/Blue, Blue/Yellow, Interleaved(refer to the type of your 3D glasses), regulate the value in the 3D Depth box to the necessary 3D effect.
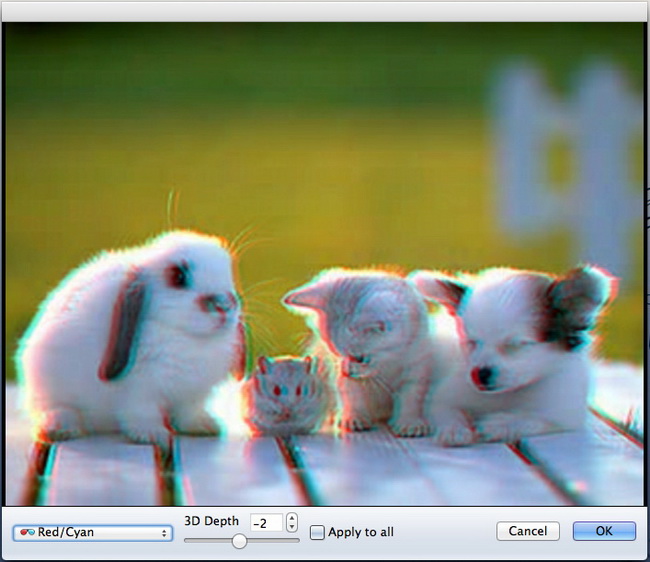
Step 3: DVD Menu Preview
Go to the "Menu Templates" button at top right corner of the following interface, and then you can choose a specific DVD menu from menu themes including Standard, Business, Education, Holiday, Nature, Others and Customized. This software provides you with the function to have a real-time preview on the DVD menu. If you do not want the menu, you can remove it by only clicking on the "Disable Menu" button, and to further customize your DVD menu, you can tab on "Design Menu" button.

Tips:
Main: play or select chapter (Play: play all videos from the very beginning to the end. Chapter:play video in the submenu.)
Title: chapter list pages.
For the circular virtual keys, you need to consider two conditions:
a. When you have preview on the video, move upward, downward, leftward or rightward to choose to play the current or the next video. You can choose to Play or Pause the video by clicking on the centric button.
b. When you have no video preview, you are able to move upward, downward, leftward or rightward and then click on the centric button to position the video.
By the way, you can choose to burn to DVD-5/DVD-9 in 16:9/4:3 aspect ratio, with Low Quality, Medium Quality or High Quality. Required space for DVD burning can also be accessed here.
Step 4: DVD Customizations
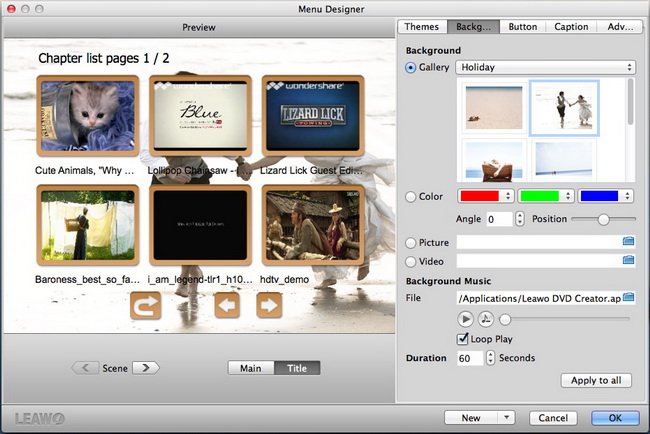
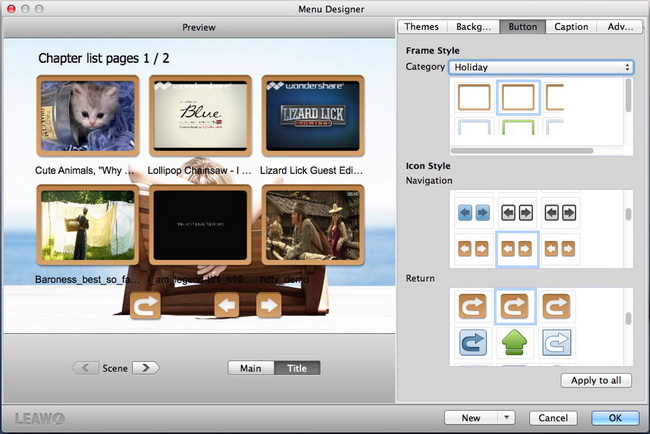
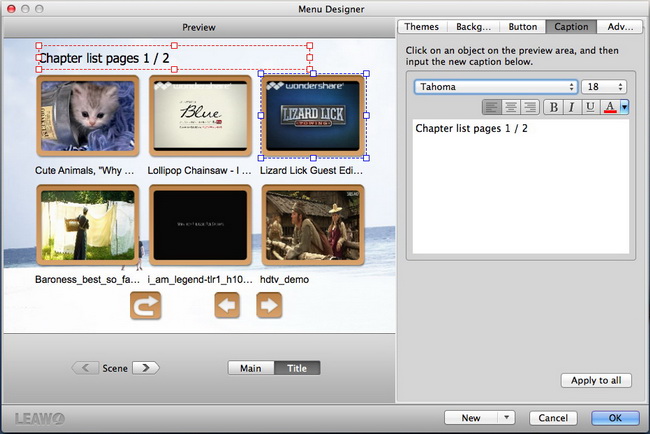
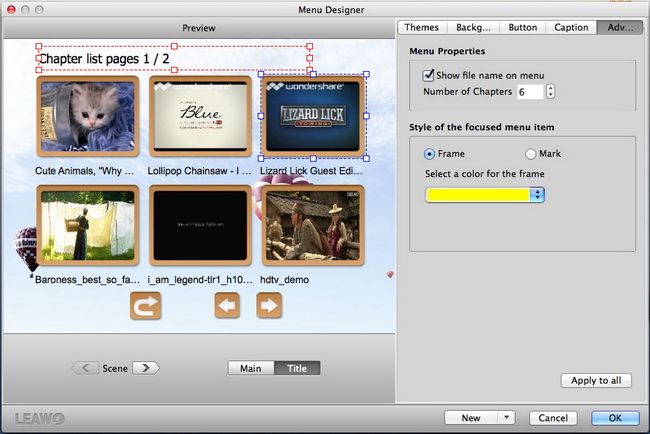
Click on the "Design Menu" button and you can shift to the interface below, and you can do some customizations.
a. Themes: choose one of the DVD menu template themes (Standard, Business, Education, Holiday, Nature, Others, Customized).
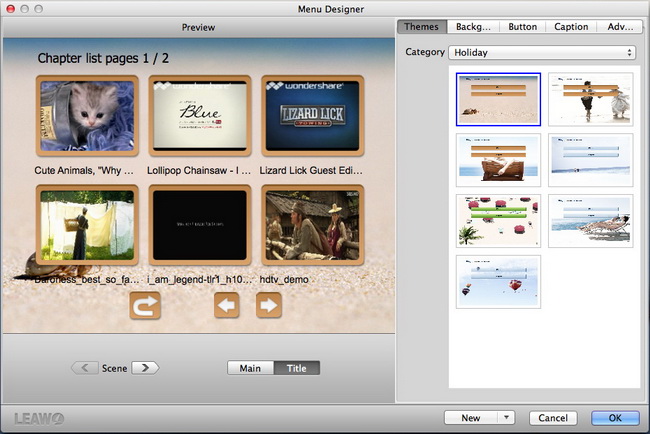
b. Background: there are four ways prepared for you to choose DVD background: Gallery, Color, Picture and Video.
You can also insert an audio file to be the Background Music from your computer. In "Duration", choose an exact value for how long you want the music last. If the original music file duration is far behind the needed duration, you can check "Loop Play".
Step 5: Further Settings
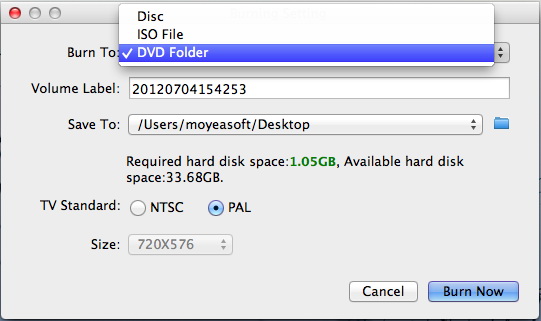
Click on the "Burn to DVD" button in the previous step, then you are able to carry out the following actions:
Burn To: burn video to ISO File or DVD Folder
Volume Label: input your own volume label
Save To: output DVD video saving path on your computer
TV Standard: choose NTSC or PAL according to region
Size: output DVD video size
Step 6: Burn Video to DVD
After some necessary settings, click on the "Burn Now" button in the previous step to get video to DVD creation on Mac started.


 Products List
with the good work.
From Jay Burt
I was lucky that my search words matched your website offering. I may recommend to
my friends about you.
From Rajesh Madhawarayan
